
Series 60 engines with Exhaust Gas Recirulation (EGR) systems built after December 1, 2003 will use a one-piece piston assembly, incorporating the dome and skirt. The new piston reduces friction, improves ring cooling and has a higher compression ratio of 17.25:1 for 12L and 16.75:1 for 14L.
Note: The one-piece piston assembly is to be used only for On-Highway applications.
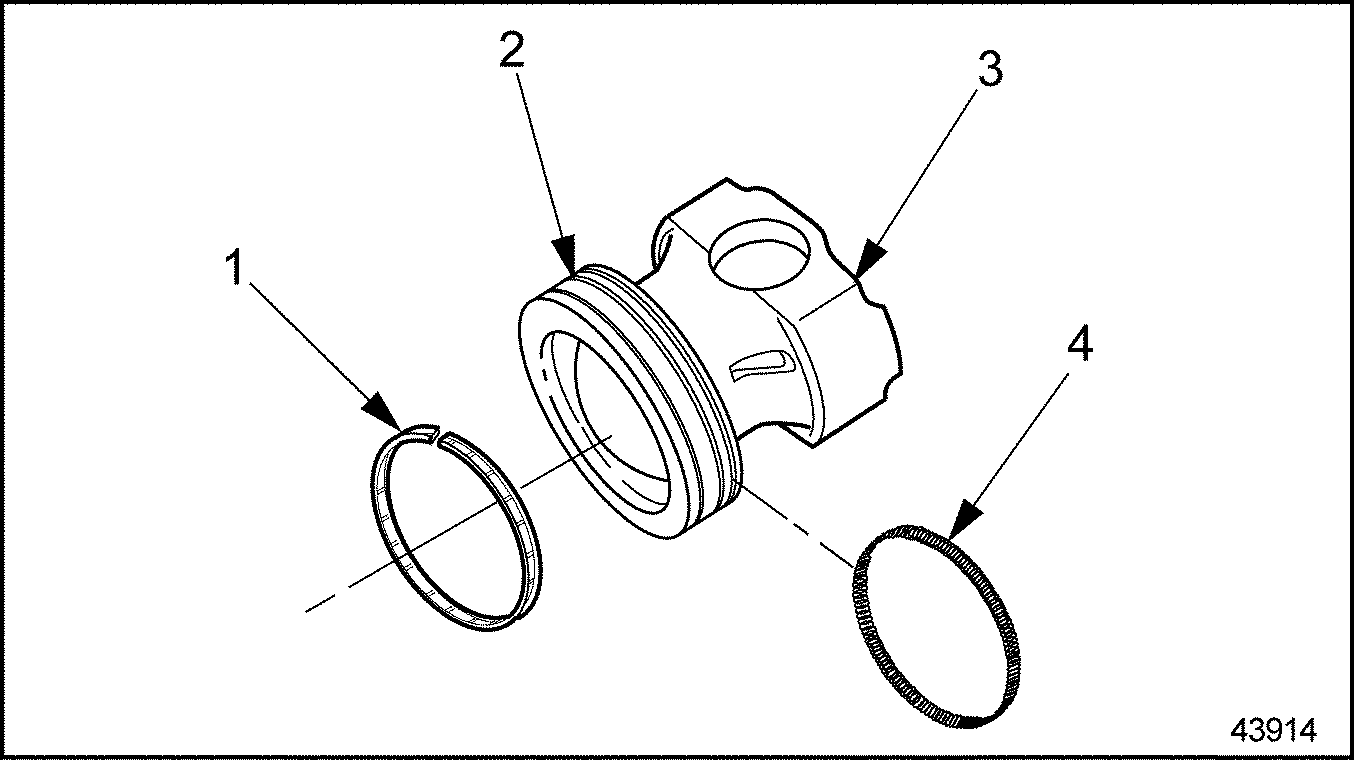
Ring grooves are machined into the piston assembly. The one-piece piston will not require the use of bushings see Figure "One-Piece Piston Assembly" .
|
1. Fire Ring |
4. Retainer |
|
2. Compression Ring |
5. Piston Assembly |
|
3. Oil Control Ring with Expander |
6. Piston Pin |
Figure 1. One-Piece Piston Assembly
Each diesel piston is fitted with a fire ring, compression ring and one-piece oil control ring with expander. See Figure "One-Piece Piston Assembly Ring Location" and see Figure "Comparision of Piston Ring Packs" .

|
1. Oil Control Ring |
5. Oil Ring Expander |
|
2. Compression Ring* |
6. Oil Control Ring |
|
3. Fire Ring* |
7. Compression Ring* |
|
4. Piston Assembly |
8. Fire Ring* |
Figure 2. One-Piece Piston Assembly Ring Location
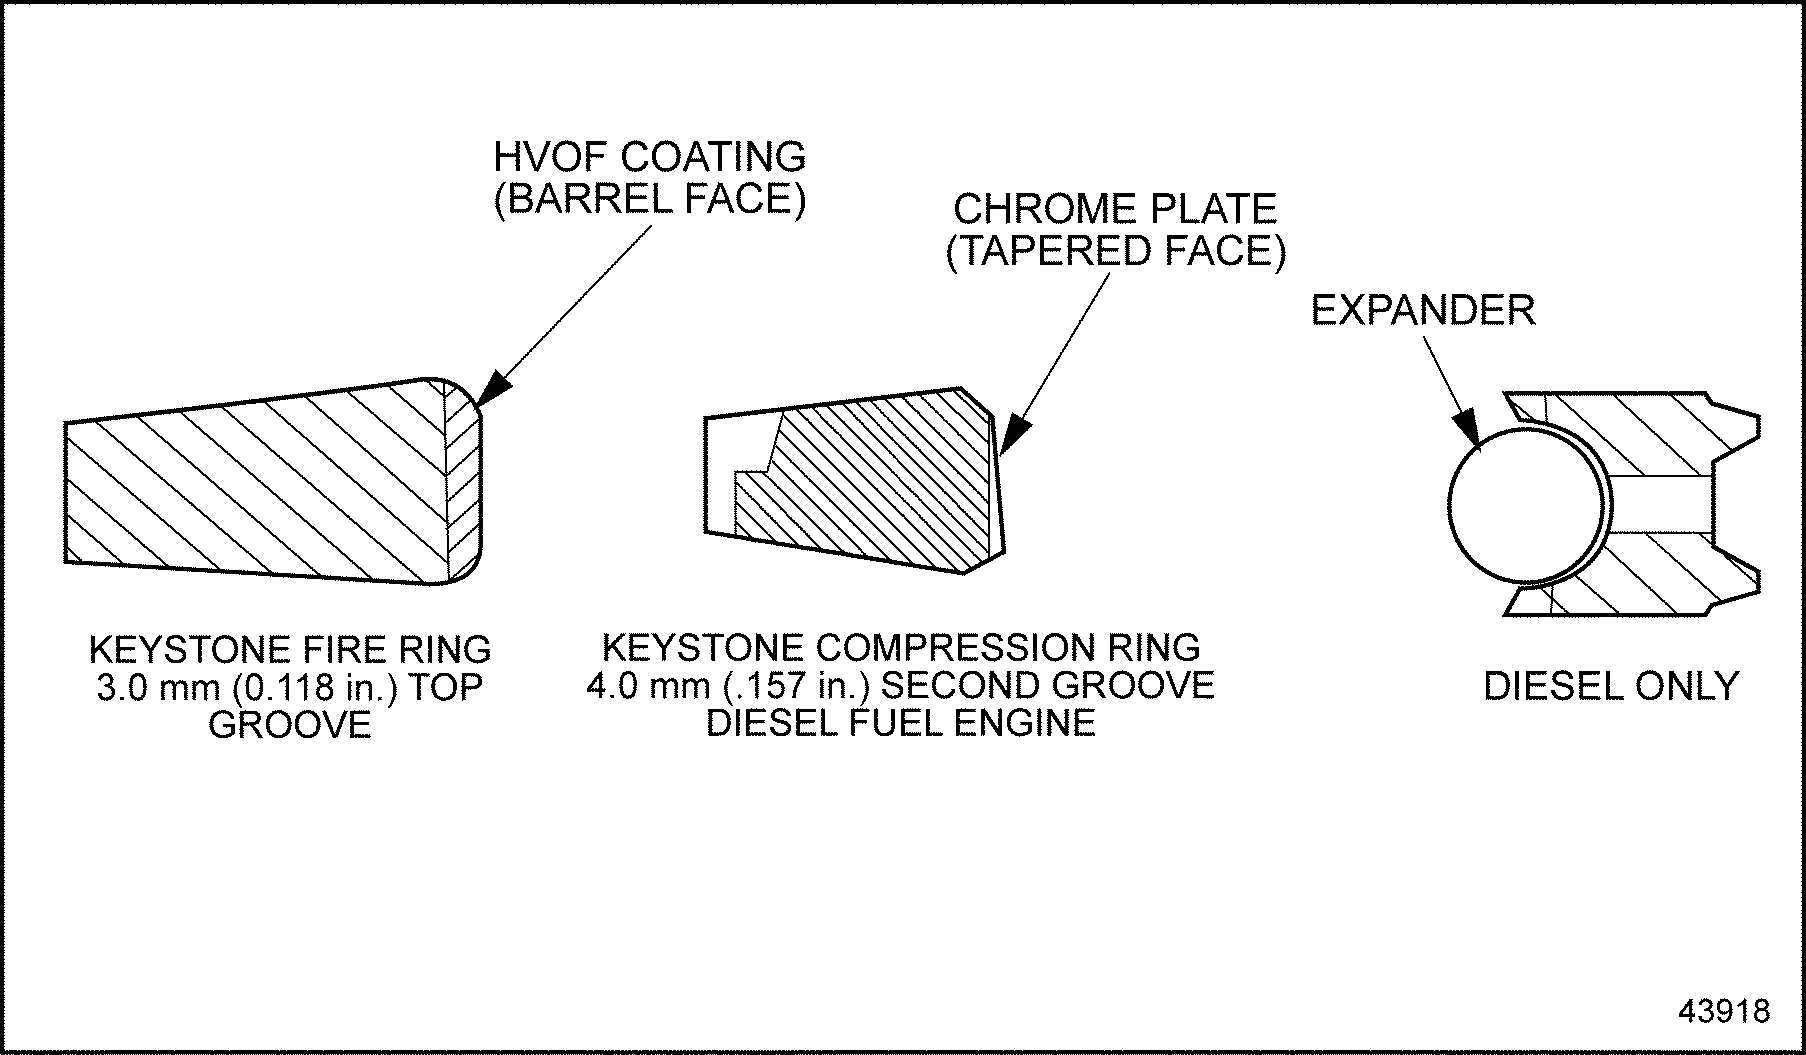
Figure 3. Comparision of Piston Ring Packs
The fire and compression rings are installed with the “identification” mark facing up, see Figure "Fire and Compression Ring Identification" .
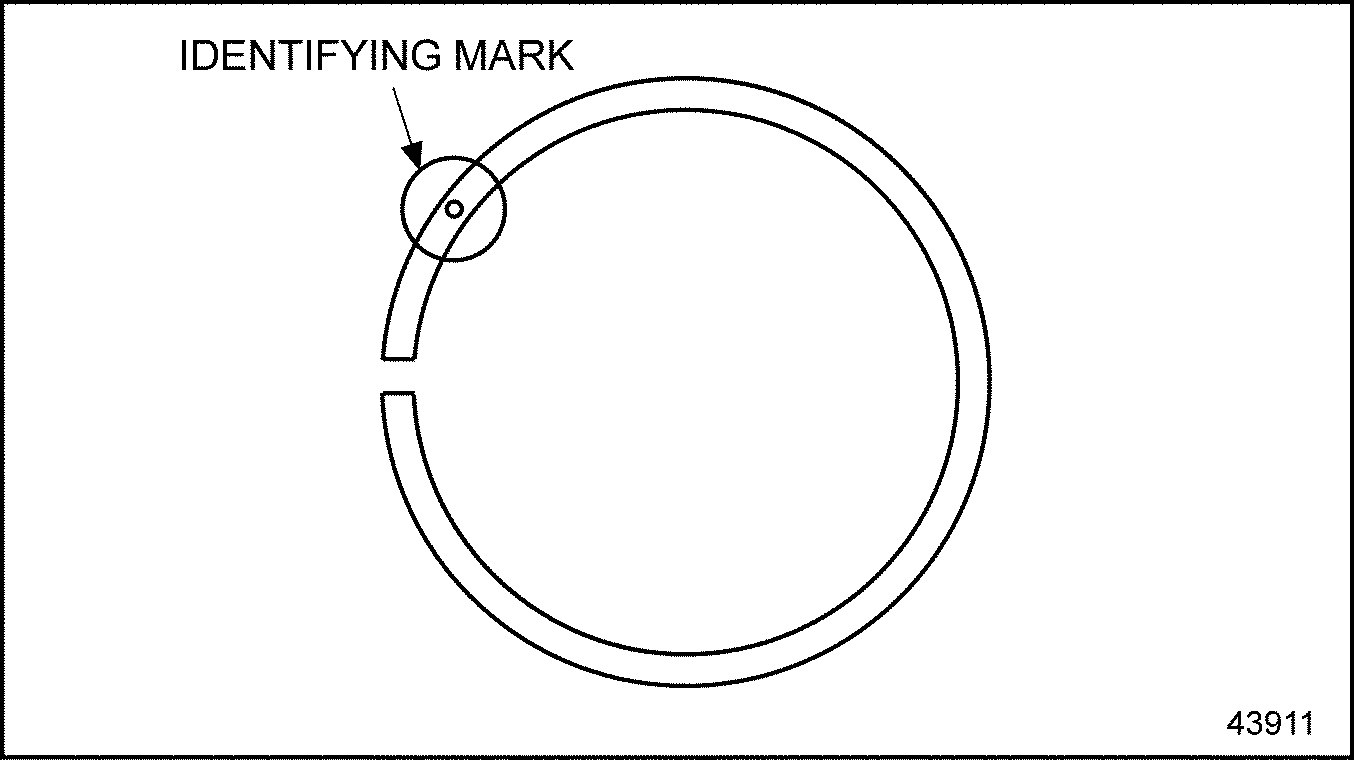
Figure 4. Fire and Compression Ring Identification
A one-piece oil control ring is used in the third groove. The expander is of Spira-Lox construction.

Figure 5. Solid Core Piston Pin Cross Section
The one-piece piston assembly uses a floating piston pin which rides on the one-piece bushing pressed into the end of the connecting rod. The original closed end connecting rod and solid core piston pin do not have drilled center orifices for lubrication. Oil for lubrication and steel piston cooling is supplied by oil spray from piston cooling nozzles at the bottom of each piston bore. For model year 2000 engines, an oil passage was incorporated into the connecting rod design to improve lubrication to the piston pin.
To determine if repair is possible or replacement is necessary, perform the following procedure. See Figure "Flowchart for Repair or Replacement of Piston and Piston Rings" .

Figure 6. Flowchart for Repair or Replacement of Piston and Piston Rings
Refer to "1.21.2 Removal and Cleaning of Piston and Connecting Rod" for piston and connecting rod assembly removal procedure.
Disassemble the piston and piston rings as follows:

Figure 7. Removal of Piston Rings
NOTICE: |
|
The pin and piston assembly must be match-marked to assure proper position and orientation. |
Note: The one-piece piston assembly require the removal of the retainer before withdrawing the piston pin.
Clean the piston assembly and piston rings prior to inspection as follows:
|
NOTICE: |
|
Do not attempt to clean the one-piece piston by glass beading. Glass beading will remove the surface treatment. Do not refinish or polish the piston pin. |
|
EYE INJURY |
|
To avoid injury from flying debris when using compressed air, wear adequate eye protection (face shield or safety goggles) and do not exceed 276 kPa (40 psi) air pressure. |
|
NOTICE |
|
Do not glass bead the pin bushing or pin bore. |
Inspect the piston assembly and piston rings as follows:
Note: Burn spots may indicate an obstruction in the connecting rod oil passage.
|
NOTICE: |
|
If the piston pin used on the one-piece piston assemblies is replaced for any reason, the piston assembly must also be replaced. |
Note: Remove any dirt or debris on the back of the piston pin bore that may take up clearance required for piston pin installation.
Prior to installing the piston rings, the ring gap of each piston ring must be measured.

Figure 8. Piston Ring Gap Measurement
|
Ring |
Ring End Gap |
|
Fire Ring (2.5 mm [0.098 in.] chrome) |
0.50 - 0.85 mm (0.020 - 0.033 in.) |
|
Fire Ring (3.0 mm [0.118 in.] HVOF) |
0.55 - 0.85 mm (0.022 - 0.033 in.) |
|
Fire Ring (3.5 mm [0.138 in.] plasma) |
0.50 - 0.85 mm (0.020 - 0.033 in.) |
|
Compression Ring |
0.80 - 1.15 mm (0.031 - 0.045 in.) |
|
Oil Control Ring |
0.40 - 0.65 mm (0.016 - 0.026 in.) |
|
14L Fire Ring: (3.0 mm [0.118 in.] chrome) |
0.60 - 0.86 mm (0.024 - 0.034 in.) |
|
14L Fire Ring: (3.0 mm [0.118 in.] HVOF) |
0.55 - 0.85 mm (0.022 - 0.033 in.) |
|
14L Compression Ring |
0.63 - 0.98 mm (0.025 - 0.039 in.) |
|
14L Oil Control Ring |
0.21 - 0.51 mm (0.008 - 0.020 in.) |
Assemble the piston rings as follows:
|
1. Oil Control Ring |
3. Piston Assembly |
|
2. Oil Control Ring Groove |
4. Oil Control Ring Expander |
Figure 9. One-Piece Piston Assembly Installation
Note: The oil control ring may be installed in either direction.
Note: Install expander into inside diameter groove of ring with expander spring gap located 180° from the oil control ring gap.

Figure 10. Oil Control Ring Installation (Diesel)
Note: The oil control ring expander has a identifying paint stripe. Make sure the paint mark can be seen after the oil control ring is installed at ring gap.
Install the fire and compression rings as follows:
NOTICE: |
|
To avoid breaking or overstressing the rings, do not spread them any more than necessary to slip them over the piston dome. |

Figure 11. One-Piece Piston Ring Positioning (Diesel)
| Series 60 Service Manual - 6SE483 |
| Generated on 10-13-2008 |